
Category: Challenges
Articles in the Challenges category
This is a layout I did for a 30-minute challenge. You were allowed to collect your photos and supplies before hand, but then you set a timer and had thirty minutes to build the layout. I did mine in 32 mintues. I probably would have been able to do it in less if I hadn’t hauled out the sewing machine.
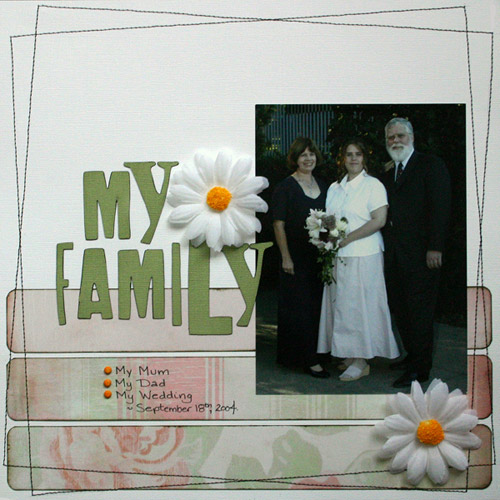
Yes, I know. It’s a rare layout I’ve done that actually depicts a person. I don’t have many photos of people and I have tons of photos of things/places, so it’s not that I choose not to scrap people, it’s just that my photos of non-people significantly outweigh people photos.
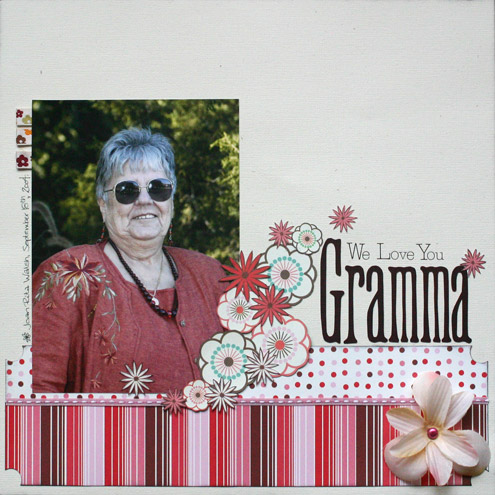
Now that the disclaimer is over, this is Gramma. She is a wonderful lady and I’m really happy to be part of her family now. The photo was actually taken at our wedding a couple of years ago. The layout itself was for a challenge on SSS that required a minimum of 16 flowers from at least 4 different sources. My 4 different sources were flowers cut from patterned paper, flower ribbon, hand-drawn flowers and a silk flower. :)
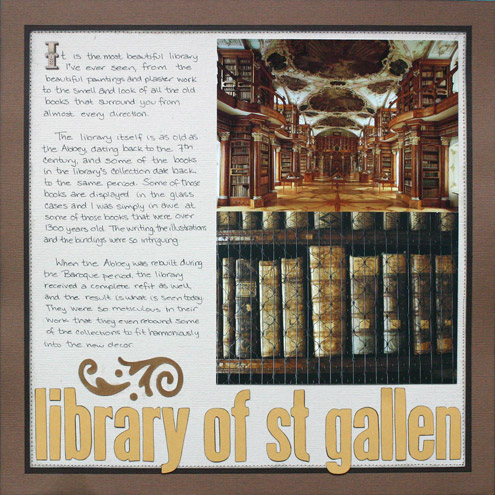
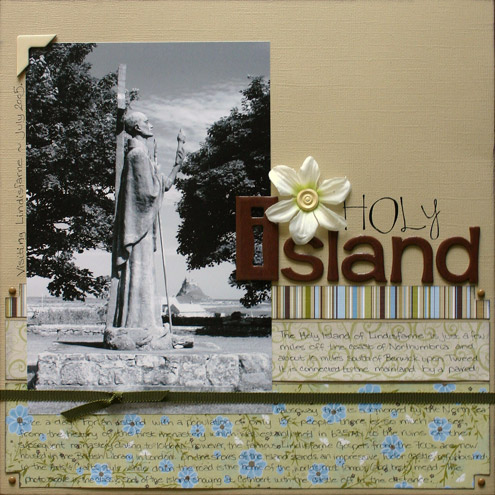
I finally got a chance to finish my layout for the memorabilia challenge done, but I was so busy chatting all weekend I didn’t get around to posting it here. So here it is… one of the most amazing libraries I’ve ever seen. And those aren’t photos, they are postcards—photography wasn’t allowed in the library. ;)
I thought I’d give everyone a break from the SEI and post something else. ;) Don’t worry, I still have a bunch of SEI layouts to upload, so you’ll be seeing more of them.
I did this layout for Margo’s DT challenge last week. (Hey, I get there eventually.) The challenge was to something wooden or wood-looking. I used the only wooden thing I had, some lil Davis wooden flowers I got from Shauna.
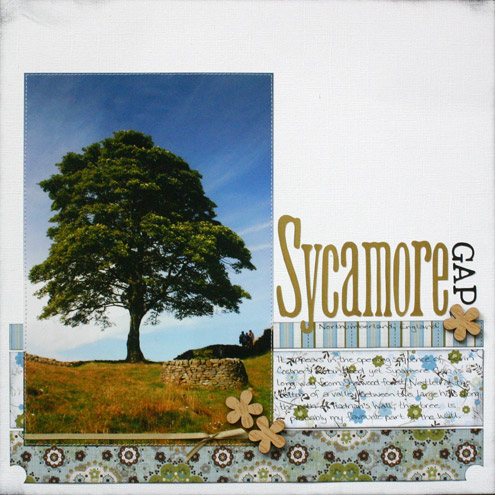
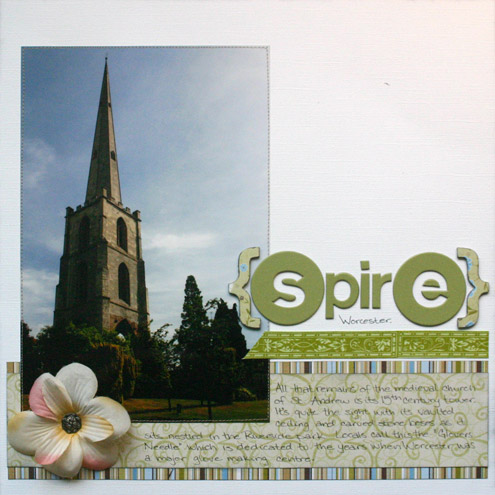
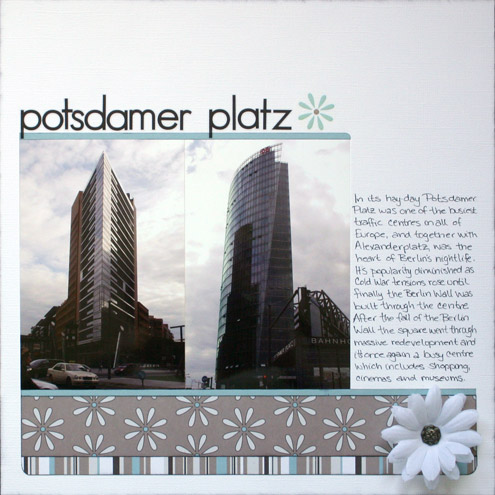
About the layout… Sycamore gap is along Hadrian’s Wall, just west of Housesteads. This tree is located in the narrow valley between two very steep hills, and it’s my favourite spot along the wall. Sycamore Gap was also used in the opening sequence of Kevin Costner’s film Robin Hood, even though it’s no where near Sherwood Forest.
I think I’ll be working on this week’s challenge next. ;)
Loading up a few more of my layouts using the SEI Granny’s Kitchen set. The first was done for a Challenge Anna Sigga posted on Shauna’s Shabby Shoppe which involved using a mixup of alphas/fonts. Since my little brain seems to have issues with using more that one font in a word, I used 9 different alphas over the course of the entire title, if you count the dymo strips.

This layout I just did for the heck of it. I’m slowly working my way through my photos. I’m trying to do a Granny’s Kitchen layout for each of my albums. So far I’ve done 10 layouts (some of which are still waiting to be posted), and still have TONS of SEI left. I think I might work with some different papers for a while then go through all the albums again. This is all working out rather well for me as I’m scrapping photos that I wouldn’t normally have chosen. For various reasons these papers go well with ‘less than exceptional’ photos and make them look good, while they look horrific with some of my favourite photos. Go figure. At least I’m scrapping some of these previously unloved photos. ;)
And speaking of challenges, we have started doing weekly DT challenges on the boards at Shauna’s Shabby Shoppe. It’s my turn this week, and I’ve challenge the members to use memorabilia on their layouts. If you want the full details, please check out the official thread.
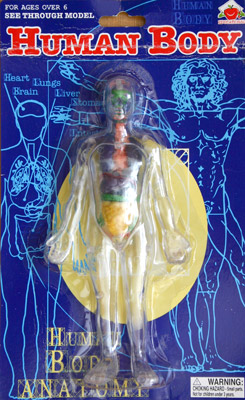
We have a challenge going on in one of my assemblage groups using those cheap little plastic anatomy dolls from the Dollar Tree. One of the members was gracious enough to post one to me so I could join in on the challenge. The photo to the right shows the blank canvas, how it arrived to me. I was so happy when I found the postie trying to stuff if through my door, and in celebration I immediately dismantled it. :)
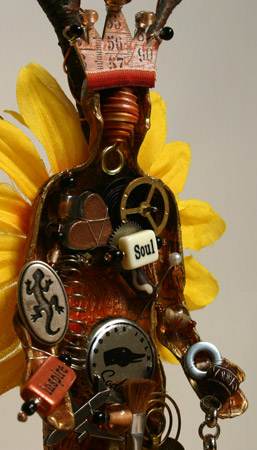
I’m actually making two pieces for this challenge—Thespin is the first I’ve completed, using the back half of the anatomy doll. I’ve always wanted to make some sort of ‘muse’ doll, however since I’ve always considered muses to be female, I created him to be a collective of some of the things that inspire me. His name is derived from Thespies which is from the Valley of the Muses, where Thespians organized their Mouseia festivals every 5 years from the 3rd century B.C.

To start, I took the back half of the Anatomy doll and began by zapping his elbows with my heat gun so I could bend them. I didn’t bend them much, probably about 1cm, but it was enough to give him a little bit extra dimesion so I could hang stuff from his hands. The next step was to cover him with modge podge, some 7Gypsies printed newsprint tissue, and a coat of modge podge to seal. Once dry, I used Golden’s Quinacridone/Nickel Azo Gold, mixed with some metallic copper acrylic and some gloss glaze medium to colour him. I then stippled on some brown acrylic to add a bit more depth, and lined his edges with a gold paint pen to give him a bit more definition.
From there it was simply a matter of filling him. My goal was to fill him with stuff that either inspired me, or things that I love (and in that way, they probably also inspire me). Some of the meanings are obvious, some a little more hidden, but they each have their own little meanings.
Most of the objects I used to build him up was ‘found stuff’—stuff I found in my studio, stuff I found along the road, stuff I found in the park. These items include clock parts, scrapbooking embellishments, beads, buttons, hardware, the metal bit off the top of a corked wine bottle, subway sub stamps, a coin and a bottlecap off a bottle of rootbeer. (The bottlecap—rootbeer isn’t usually available in England, but a nearby grocer imports bottles of it from america. I really happen to like rootbeer.) ;)
Flat objects like the sub stamps simply got adhered to the body and then glazed over to blend. Most everything else is attached with wire except for the bottlecap and the 2p coin which are glued onto cork, which was then glued onto the body. I didn’t want a lot of the wire showing on the front of the body, so I used beads to cover up where the wire had to travel across the body.
Once everything was attached, it was a matter of cleaning up the wires at the back. I brought all the wires together in the centre of the back, attached a fabric flower, and wove the wires through the centre and used them to attach the body to the stand.
The stand is created using a bell off an old-fashion style alarm clock as the base. I was originally going to fill it with plaster to add some weight, but the entire piece ended up having such great balance (a fluke) that I just didn’t need it. I covered the bell in the same manner as I did the body, then screwed it to a stick with a washer in between. I added a ring of beads to the bottom of the stick to finish it off, and wrapped copper wire around the branches for a decorative element.
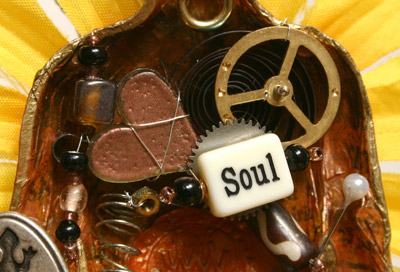

The entire piece stands 13.25-inches tall, and I’ve included a few extra close-up photos to show some of the details in the chest cavity and in the hip area, the two places with the most ‘stuff’.
Thespin was so much fun to make. I really got to let loose and play, and it gave me enough of a challenge to keep it quite interesting. Figuring out how to attach everything with a minimum amount of glue and making a stand for him were probably the greatest challenges, although easily solved with a bit of thought and some rummaging. And aren’t those the fun bits anyway??
The theme for June photo challenge on Scrap That Moment is ‘Your Town’. It could be your home town, the town you live now, a big (scenic) photo or your favourite statue. For full details on this challenge, please refer to the official challenge thread.
Here’s my first entry for the challenge, the Newcastle-Gateshead quayside during the Tall Ships Races last year:

It’s the beginning of the month, so I’m announcing my new challenges—one today, and one tomorrow. On Shauna’s Shabby Shoppe our photo layout challenge for this month is scrapping Black & White photos. For full challenge detais, please check out the official challenge thread. This is my layout for the challenge:
Check back tomorrow for updates on my other challenge! ;)
Christy Tomlinson posted a preview of the new chatterbox papers on her blog the other day.
If you are a fan of Chatterbox products, like I am, then you may wish to check out the monthly contest at Shauna’s Shabby Shoppe as it will be judged by the afore mentioned Christy Tomlinson. Just a heads up. ;)
I’m going to work on a layout, then I think I’ll do an art doll. Life is good. :)
I’ve posted both my challenges for May. Just in case you are interested:
On Shauna’s Shabby Shoppe, the theme for this month’s layout is ‘People’. For full details, please see the official challenge thread. This was the layout I did for the challenge:
On Scrap That Moment the photography challenge theme for this month is ‘Hobbies and Pastimes’. If you are interested in this challenge, you can find out all this info on the official challenge thread. And this was my first entry:
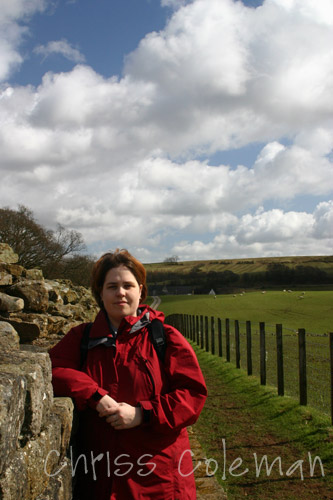
That’s me leaning against a 2,000 year old wall. The photo is courtesy of my husband. ;)