
Category: Mini Albums
Articles in the Mini Albums category
Just a few of the collection:

![]()
When I got this tin (with the Maya Road chipboard in it), I was not sure if I was more excited about the tin or the chipboard—and that’s saying a lot since I love chipboard. I couldn’t wait to evict the chipboard and start altering the tin. I admit it, I have a serious magpie complex.
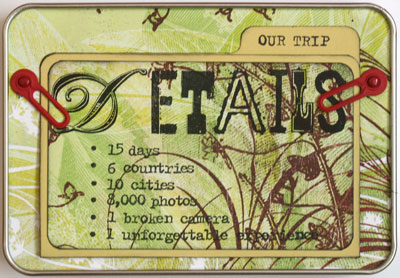
I wanted to create a tin where I could keep our momentos from the holiday we took on the continent a few years ago. You know the stuff that just doesn’t fit well in a scrapbook. The stuff that simply makes a page too heavy. The stuff you have a million of and can use in several projects. That’s what this tin was about.
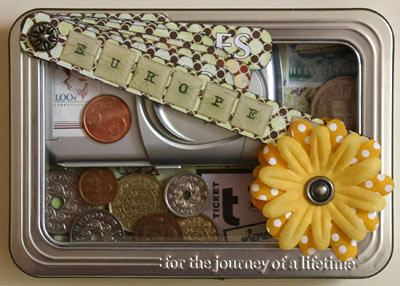
This is the whole thing put together, with all the papers and items in place…. but I’m getting ahead of myself.
To decorate the tin I taped a piece of ribbon around the outer rim of the lid for decoration. I could have papered the whole thing or painted the tin, but I was worried about the lid being to tight to close or the paint scraping away or chipping. Besides, I really like the look of the dull shine of the metal, and I knew it would work well with the items inside the tin.
I didn’t actually poke a hole through the lid for the flowers, but rather pushed the brad through the flowers, bent back the prongs and used double sided tape to adhere it to the lid. Nice and simple, and that flower has no intention of moving.
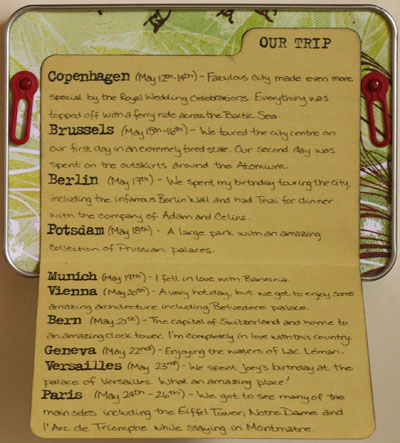
Although I loved the slogan at the bottom of the tin (for the journey of a lifetime) and found it very appropriate for my theme, I didn’t want the ‘Maya Road’ showing itself in the top corner. My solution to create tags, one for each of the cities we visited and a title tag and glue the bottom tag over the ‘Maya Road’. With the exception of that bottom tag, all the other tags move freely.
I coloured the back of the tags with dye ink, although using patterned paper would also have been appropriate. I placed another flower on the interior to cover up the brad back showing through the lid, and used Dymo tape to cover over the embossed name and slogan on the lid. If you have the patience, you might want to cut a piece of patterned paper to fit in that area, but quite frankly that would put me through the roof if I couldn’t get it exactly right. I thought the Dymo solution was far less stressful. :)
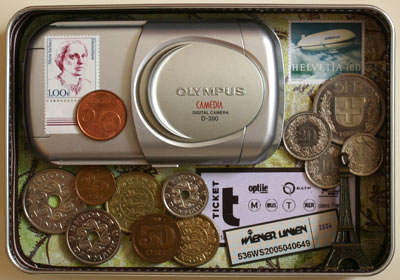
The tin interior was fun to do. First, I lined the bottom with patterned paper, and then lined the sides with ribbon which was equal to the depth of the tin. From there, it’s just a matter of filling the tin! I used the front off my camera which broke while we were on holiday, a few unused leftover postage stamps, some coins, an Eiffel Tower keyfob, and a few various ticket stubs.
I used foam tape to adhere the camera and to pop-up some of the coins to create depth. The keyfob is glued to the ribbon with super strong adhesive to keep it in place, and I matted the tickets to make them stand out a little bit more. If you don’t have a lot of room (and they aren’t your only ticket stubs) you can always cut your tickets down to include only the important bits.
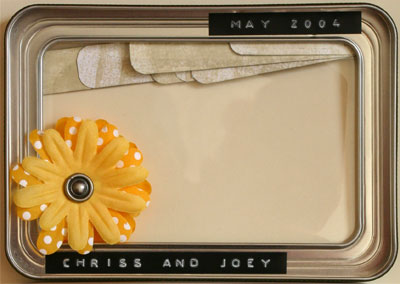
I wanted to include some journalling with the tin, so I decided to create a file folder to write a few brief thoughts. I decided on the size and shape of my file folder, cut my liner piece and attached the photo turns before I adhered the liner to the tin.
I decorated the file folder with the same patterned paper and used stamps to title the folder and emphasize the names of the cities inside the folder.
And this is the finished piece:

Supplies:
Maya Road Chipboard Tin
Basic Grey papers
Doodlebug flower
EK Success epoxy letters
DCWV letter stickers
WorldWin Cardstock
Tim Holtz Distress Ink pads
Making Memories and Bazzill brads
7 gypsies photo turn
Ma Vinci and Technique Tuesday stamps
Ribbon and Dymo
The talk about this site is everywhere. Big Picture Scrapbooking is the latest ‘big thing’ for scrapbookers on the web. It’s mission is to get you to think a bit more out of the box in terms of scrapbooking and to celebrate life through your scrapbooks. Registration has already begun for the online classes which are being taught by Donna Downey, Cathy Zielske, Beth Proudfoot and Stacy Julian.
To get people to see what the site and the classes were about, they offered a Free Class in which the project was to create a scrapbook tin. I downloaded the project a couple of weeks ago. Now I just need to select (or take) some photos, edit and send them to the lab for printing. Somedays I believe that not having a home printer requires me to have to plan too much. Anyway, I’m hoping my trip to London this week will provide me with a few good photo ops, so I’ve been putting off making this project. I’m thinking that it may be one of the first projects I work on in the new year.
And no, I have no affiliation with them. I just think it’s a cool project, and besides, I have a few “Altoids” tins that I’ve been hanging onto for a rainy day. ;)
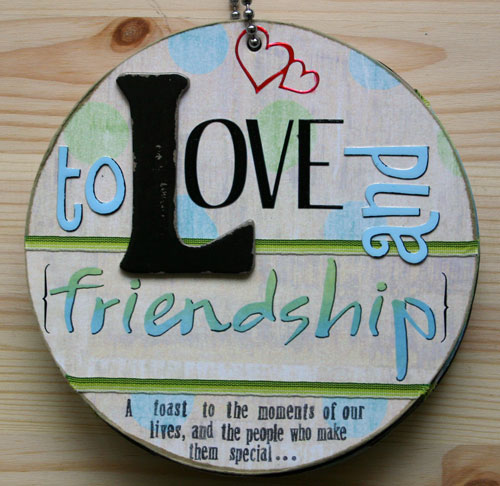
Every year Lynette holds a ‘Give Thanks’ contest in celebration of Thanksgiving, where she send out a gift to anyone who wished to take part, and the participants make a layout using the gift. This year’s contest was sponsored by Bound + d/termined and each of the contestants received 3 papers from their new Word to the Wise line, and these particular papers were from the friendship set.
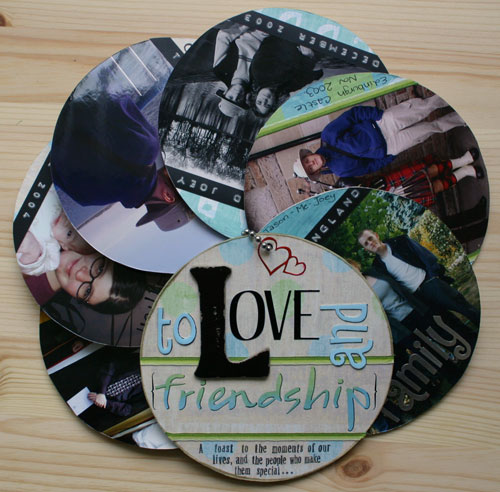
After humming and hawing for quite a while, and not finding ‘the right’ photos for the papers, I nearly gave up. I sorted through my ever growing stack of photos, and started pulling out all the photos of people. I ended up with about a dozen photos. None of the photos were really suitable for enlargement, but the photos were still dear to me. I thought a mini album was the answer. Something big enough that I didn’t need to crop out a lot of the photo, but small enough that the photos didn’t get lost. Since I didn’t have any small albums on hand, I decided to make an album out of chipboard. Love chipboard. :) The pages are a little larger than a CD, and so much fun to make. And it means all those photos of us and our friends that never quite made it into our albums now have a home. It’s also most definately a work in progress. I’m still finding photos that were never printed that need to go into this album.
Recently I’ve been scouring the web, looking for ideas for mini albums as inspiration for a gift albums I’m making for a friend. In doing so, I’ve found many great ideas that I would like to use on future projects, and thought I’d share them here. So today we are going to talk about Paper Bag Albums.
These are currently all the rage, and have been so for about a year now. They are fun and easy to do, and unlike traditional albums there are very inexpensive, as they are made with paper lunch bags which can be found at many supermarkets. Paper bag albums are perfect for brag books, theme albums or for a quick and fun gift.
Most paper bags are not acid-free, so make sure that you use copies of photos and memorabilia as the acid in the bags will cause them to become brittle over time. Using de-acidification spray, such as archival mist, on the paper bags before assembly can help increase the longevity of your album. Also, you may wish to check out your local craft or party supply shop for coloured paper bags. Most paper bag albums are made with the standard lunch-size bags, resulting in an album approximately 5×5-inches, however larger and smaller sizes are available.
There are a lot of instructions available on the web, however here two of my favourite:
- Rita’s Instructions – full instructions with lots of photos
- Julie McCauley’s Instructions – basic instructions with a great photo of the finished product
I do suggest that you pre-make your pages before adhering them to the paper bag album, just be sure to measure your pages carefully first. By doing it this way, you won’t have brads and other embellishments sticking through into the pockets where they will catch and damage your tags, photos and memorabilia.
If you need more inspirations, check out Two Peas in a Bucket’s Search Feature using the term Paper Bag in the title field (leave everything else blank).
Happy Scrapping! :)