
Category: Photographs
Articles in the Photographs category
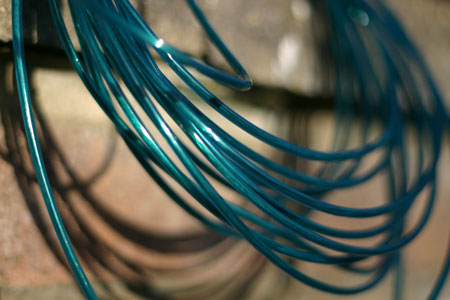
Since our washing machine died last month I haven’t had to use this… our new washing machine has a built in dryer. :)

I’ll be back with more fibery goodness tomorrow. :)
I’m not someone that takes a lot of photos of people (photos of my daughter being an exception to this rule), but since one of my goals is to photograph (and share) the everyday I thought I’d share this photo. Now no one can complain I didn’t share any ‘people’ photos in Project 365. This is my baby girl in her beloved Baby Bjorn as worn by myself.

One of my expeditions this year will be Project 365 which is a challenge to take a photo a day for an entire year. The question is — can I do it?
I do take photos nearly everyday for one reason or another, so as much as this will be a challenge to ensure I do it everyday, it’s not necessarily that much of a stretch. Can I take a photo everyday for a year? Probably. Can I manage to blog about them regularly? Hmm.. that is another challenge entirely. As much as a daily posting would be optimal, I’ll try to do a 365 post every few days or a weekly round up.
My goal with this is to improve my photography, explore the everyday and really become one with my equipment.
Today’s Photo:
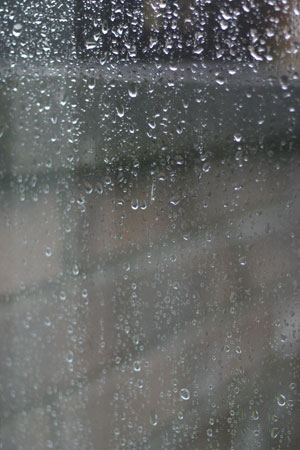
Folks in Britain love to talk about the weather and since it’s been raining all day I thought a rain photo was an appropriate way of starting off the new year. This was our view out the kitchen window this morning.
I will be creating a photo album for Project 365 in the Gallery area, but it currently seems to be broken. If and when it gets fixed I’ll post the link.
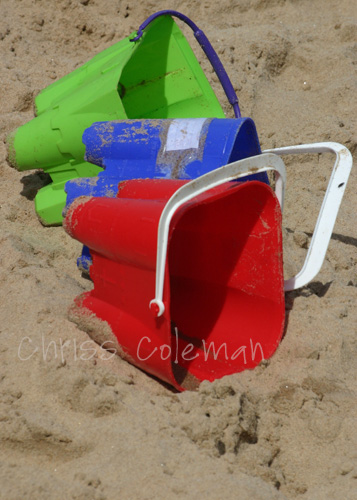
I’ve just posted the July Photo Challenge on Scrap That Moment and our theme this month is ‘Summer Fun!’. For full details about the challenge, please check out the official challenge thread.
This is my first entry into the Challenge. It was actually taken on a glorious day in May out at Tynemouth. The buckets aren’t mine, but the owner graciously allowed me to photograph them. :) I loved the colours and thought they lay in the perfectly haphazard… I couldn’t have posed them better had I tried.
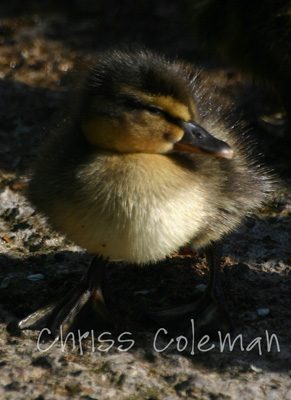
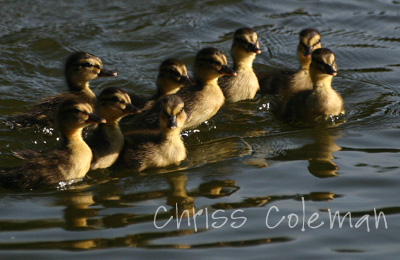
Aren’t they adorable?? A total of nine of them, and they are freshly hatched—this was their first day on the pond. They were so cute. Some of them were still have slightly balance issues while standing on land. :)
These adorable little ducks totally made my day, and I had to grab a couple quick shots before running to work. I’ll go back out and shoot some more photos when I’m not trying to beat the clock.
Just thought I’d share a few photos I took from when Lisa was here. And yes, I did take photos of her, too. I just didn’t post them… but that doesn’t mean I’m not going to scrapbook them! :)
I arrived in London in the morning and had an entire day to wander around aimlessly. I was planning to visit some of the historic houses, but it was such a fine day that I decided to take some photos of the famous London landmarks while the going was good.
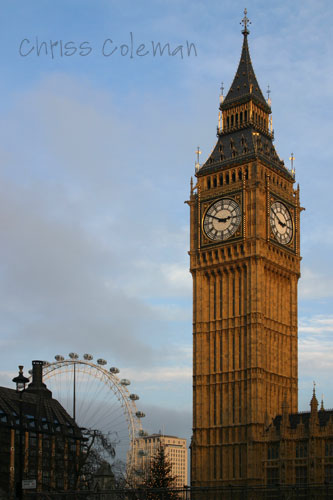
First stops were Trafalgar Square and Waterloo. This photo was taken on the Jubilee bridge near the London Eye.

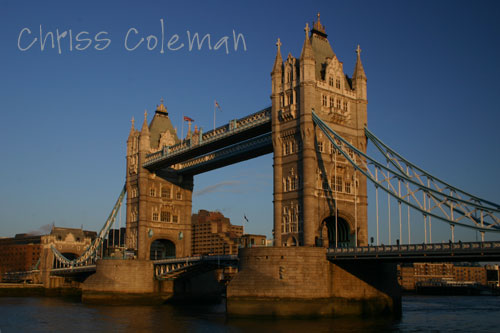
Then I spent most of the afternoon walking along the Thames along Queens’ Walk, starting at the London Eye to the Tower Bridge, taking in lots of photos on the way. Of course, Tower Bridge is probably my favourite London landmark, so I couldn’t stop without taking at least a couple of photos.
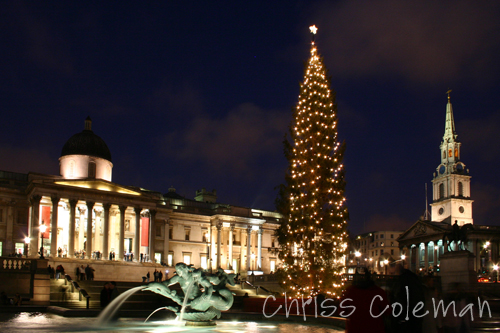
As the sun was setting, I quickly jumped on the tube and made my way back to Trafalgar Square. I really wanted to get a photo of the square at night with the Christmas Tree before going to get Lisa at the airport.
The next day was quite overcast, but we had a great day nonetheless. I took Lisa to the London Eye, Trafalgar Square, the Parliament buidlings, Westminster Abbey, Piccadilly Circus, Bond Street, and Regent Street. This is one of may favourite photos of the day, taken while standing in queue for the Abbey.
The following day was very wet, but we enjoy some indoor tours of the Tower Bridge and St. Paul’s Cathedral, and then braved the rain on Abbey Road and Oxford Street. We also had the lovely company of an Aussie, Rachel, who we met that morning.
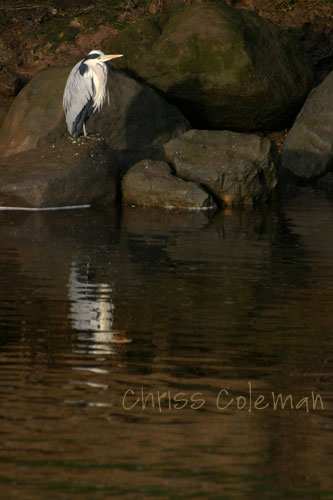
On returning to the Newcastle, we visited around Newcastle, Tynemouth, Warworth, Alnwick, Durham, Hexham, Haltwhistle and Hadrian’s wall. While in Warkworth we came across a heron along the river. Glad he stayed still long enough for me to change lenses!
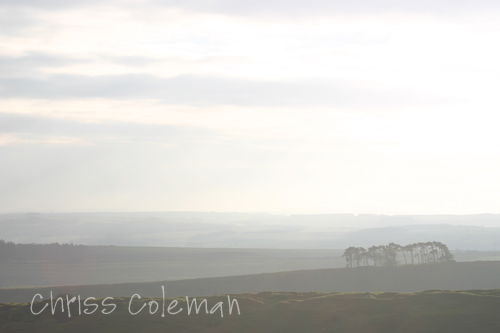
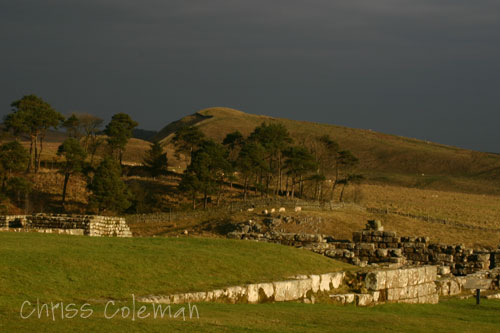
We also enjoyed a bit of sun streaming through the clouds while at Housesteads, where I took these photos:
I really hope my cousin had a good time. I certainly had a good time playing tourguide! Now I just need to get these photos printed so I can start scrapping them!
There were some articles recently published on ScrapJazz which focused on the basics of photographing your layouts. I thought I’d share them here.
Denise Gormish wrote the first back in April which dealt with the basics of photographing a layout and then followed up with some more advanced techniques earlier this month. She has some great tips in there, and they are well worth a read.
I would also like to add a few more for those who have access to PhotoShop or PhotoShopElements, both available from Adobe or any other digital imaging program with a Skew function.
First, Denise suggest adding some white or black to the layout (which she suggests you can later edit out). The premise is something to which I would wholeheartedly agree, and in fact do myself. I simply take a white envelope, and place it beside my layout. By adding something white, it is easy to go in and fix any colour casts at the touch of a button, especially useful since I photograph my layouts indoors.
After I have colour corrected my layout, I crop my layout to 12 by 12-inches, getting as close to the edges as possible, but without cutting off any of the layout.
Next, go to Image—> Transform—> Skew. (It’ll pop up a window about a new background layer, just enter through that… technically, you can create a new background layer first, but I’m too lazy to bother, especially when the program will do it for me with a couple touches of the enter key.) Now simply drag the corners of the layout to meet the edges of your crop until you no longer see any background. Voila! A perfect 12×12 layout without any background.
Now you’ll need to flatten the layers (under Layers—> Flatten Layers), and resize and save your layout as needed.
The Skew function is very useful if you can’t get perfectly perpendicular to your layout (for instance, I lay mine on the coffee table, and get it ‘as close as possible’ knowing I can fix any coverging verticals with the Skew function).
If you have a two page layout, just take two photographs, edit each separately, and stitch them together. :)
Depending on the number of photos you have, sorting them can be quite time consuming. However, scrapping your memories becomes much easier if your photographs are already sorted.
My suggestion is to sort your photos in small chunks of time—say 10 to 20 minutes. Where you begin to sort will depend on how far you’ve come in organizing your photos. So here’s a step-by-step list to get you started.
- 1. Put all your photographs in one spot. Collect them from all the various rooms and boxes, and simply put them in one spot. By having all your photos together, it will be easier to organize.
- 2. Now sort your photos by their decade. Get a photo box for each decade, and sort your photos into their appropriate boxes.
- 3. Create some sort of divider system, using one divider per year, and sort your photos into their respective places. Just do one box at a time. Once the photos are sorted by year, proceed to organize them by event, if relevant.
- 4. Add in any relevant information, like the 5Ws or journalling notes, either on the backs of the photos with a photo safe pen, or on index cards that can be keep alongside the photos.
- 5. As you get your photos back from the developers, make note of any important details and file your photos immediately! It’ll save you a lot of time in the long run. Also remember to file photos that you pulled for scrapping but didn’t end up using.
Once your photos are organized, you’ll need to find a system of storing them that works for YOU. I’ve mentioned a couple methods in a previous article that you might find interesting, including using envelopes or photo albums.
The key is to take 15 minutes a day to organize your photos, and organize them in small steps. The task will seem much less daunting if you approach it using baby-steps. It’s also amazing how much you can get accomplished over a short period of time.
My husband and I (mostly the former) have been working very hard over the last several days to add and customize a gallery for SheepSpace. And it is now officially up! :)
We’ve developed it using albumpattern, and have created two separate galleries—one for layouts, and one for photos, for which there are links in the navigation bar at the top of the page.
And now the fun of loading stuff has begun. I’ve loaded just a couple of photos/layouts to start with, but I will try to load a couple every day or so.