
With the advent of die cut machines and computer titles, the use of hand cut lettering isn’t as prominent as years past, however, I think they still have there place. They simply have a classic look, and can be done in any type of font you wish, and I would like to share a few tips I have learned.
- 1. Use one of those craft knives with the break-off blades. They are made by a variety of companies, and are much the same, however I do like the kind that has a lock on the blade so that it doesn’t accidentally move while you are cutting. You can use an x-acto or scalpel, but I like how easy it is to simply break off a blade when I need a sharper edge.
- 2. Always use a sharp blade. I will often break the blade tip off after about 6 letters if I’m cutting paper, or about 3 letters if I’m cutting cardstock. The sharper you blade is, the better the cut, the easier it is to cut, and the less likely you are to cut yourself. On the latter note, the duller the blade the harder you will need to press and so therefore if you accidentally slip while cutting you will most likely injure yourself worse than if the blade had been sharp.
- 3. Use a glass cutting mat. I simply use piece of glass from a cheap photo frame I bought at Ikea, but any piece of glass will do. I find that it is easier to cut (especially on curves) if I’m cutting on glass, and that my blade stays sharper than if I were to use a self-healing mat. I used a self-healing mat for years, but the instant I tried using a glass mat I never went back.
- 4. Use your own handwriting or a computer font. Using your own handwriting is always fun, and Carrie Owens posted a wonderful example of how she does her beautiful hand-cute block letters. If you wish to use computer fonts, there are two ways to go about this. First is to print directly onto the paper or cardstock you are cutting. You’ll need to Mirror Image (reverse) your text horizontally in whatever word processor you are using, and then print on the backside of the paper/cardstock, this way you’ll be able to simply cut around the letters, but the ink doesn’t show on the right side of the paper. If you don’t want to print directly on the cardstock (for instance, if it’s too think to go through the printer), then print out your letters onto regular paper, and then place your printed sheet over your cardstock with a sheet of graphite paper in between. Trace the letters, then cut them. I recommend graphite paper because it isn’t as messy as carbon paper, and the lines can easily be erased with a good rubber.
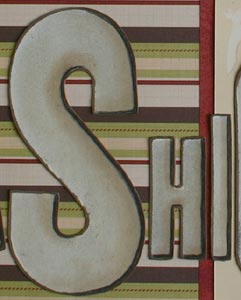
- 5. Use rubber or foam stamps. This is one of my favourite things to do. I simply stamp out my title on a piece of cardstock, then cut them out leaving a little border of the cardstock showing. This technique really allows the letters to ‘pop’ off of the page
I hope these tips will encourage you to try hand cut letters, or even try them again.