
Sue and I were playing around with Polymer clay yesterday. It’s a medium we’d both used before, but we thought we’d make a day of it and christen her new pasta machine and oven that were dedicated to polymer clay use.
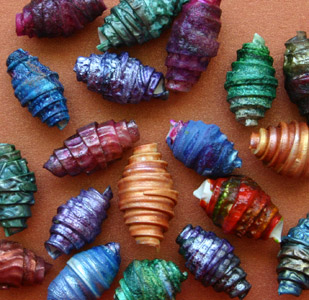
The inspiration for our first project came from the book Polymer Clay Surface Design Recipes: 100 Mixed-Media Techniques Plus Project Ideas by Ellen Marshall. If you want to use and decorate polyclay as you would textiles or paper, then this is definitely the book for you. One of the projects in the book was polymer clay beads, done in much the same was as paper or fabric beads are made. The base was a neutral colour clay and the colour was added using various agents suspended in shaving foam. The book recommends using dye, although we experimented with dye and metallic reinkers, acrylic paint and glass paint. The metallic reinkers seemed to give the best effects, but to give you an idea of the results, the copper coloured one near the middle was a re-inker, the red/green one to the right of it is glass paint, and the green/blue one at the very bottom in the centre under the copper one was adirondack acrylic paint. These were really fun to make, and we had a production line going on with Sue colouring the beads while I rolled them. I also found that some of our best best were the made from clay I had added texture to using one of several texture mats.
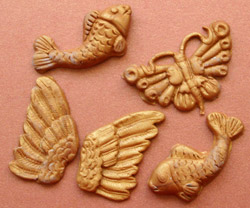
We also experimented with using clay in molds. We found the harder Fimo better for the moulds than the softer Sculpey, but no matter which we clay we used we had to be sure to use a little Talc Powder on the mould if we ever wanted to get it out. The metallic gold clay we made these moulds out of we some rather ancient stuff that Sue revitalized with some magic polyclay solution and some elbow grease. Some of the clay we used was 20 years old, and after a bit of work it worked as good as new.
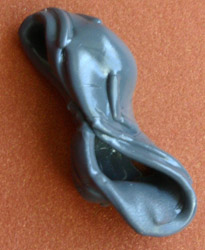
As with any good day of experiments, we had our share of disasters. It started with the item at the right. This used to be a slide mount. In one of the Expression magazines, they used polyclay on slide mounts, and mentioned to test the slide mount on its own in the oven before committing any to clay. After seeing our lump of molten plastic at the bottom of the oven, we decided to pass on the slide mount stuff. I took the former slide mount home and plan to use it somewhere in a project… mostly because Sue dared me, and quite frankly I’ll use just about anything especially if somebody dares me to use it.
Our last experiment started innocently enough. I just needed some stuff to use on some ATCs I’m working on. I rolled out some beautiful copper clay (about the same colour as the background I used for all the images.) and stamped some lovely images, carefully cutting out each one. We popped them into the oven (along with the moulded wings pictured above) and set the timer to 30 minutes. After a couple minutes we noticed a bit of light smoke coming from the cooker, and really took no notice. After about 5 minutes, there was clearly a fair amount of smoke coming from this little cooker, and we were discussing how much fumes come from the polyclay, and how it was so good we had decided to do this on a beautiful day when we could have the windows wide open. After 10 minutes there is billowing thick smoke and a stench filling the room. We decided that it might be a good idea to open the cooker door and see how they were doing.
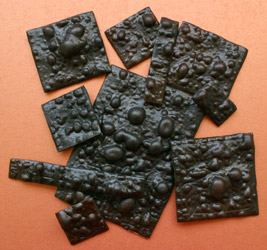
Okay folks, if you are curing your poly clay in the oven and start to see smoke coming out of the cooker it may be a good idea to actually open the door and see what is going on instead of chatting about toxic fumes and waiting until it is black billowing smoke and then asking ‘Do you think we should open the door and check on them?’. We pulled out the pan, and found a pan full of charred, bubbled, blackened bits of polyclay…. and a few wings that ‘made it’ for the simple reason that they were much thicker than the stamped images. Needless to say that Sue and I were in absolute histerics about the entire thing. Maybe it was the fact we’d just spend the afternoon making these charred bubbled bits. Maybe it was the fumes. Maybe it was the fact that I was wondering if I might be able to stitch through them, however, nobody in the house seemed to find it as funny as we did. What was even funnier was the fact that with 4 other people in the house, no one bothered to find out why the house was filling with a burnt plastic stench… they simply took it for granted that the smell was coming from whatever we were working on.
For the record: Yes, I saved those burnt and bubble pieces. No, I don’t plan on binning them. Yes, I do plan to use them. Quite frankly, I think they would look rather lovely once they are guilded. I’m still working on how to stitch through them.
Comments
— Susan · 3 June 2006, 23:05 · #
— Anna Sigga · 5 June 2006, 18:12 · #
I laughed all over again, I think you had to be there though !!!!
Sue x
— Sue · 10 June 2006, 17:33 · #