
I decided to do a bit of some experimenting while developing some backgrounds for some current projects I’m working on. I was fairly pleased with the results so I thought I’d share the process here.
Ingredients:
- Commercial or hand dyed fabric (I used a commercial piece that has a variety of weaves and colours included some lovely moss greens and tans)
- Puff Paint (I used Pebeo Touch Volume in White)
- Fabric paint (I used Pebeo Setacolour in Chamois)
- Ink Pads (I used Tim Holtz Distress Inkpad in Vintage Photo and Tea Dye)
- Embossing Powders (I used Heat It Up! embossing powders in Moss and Copper)
- A sponge, brush or some kitchen towelling for dabbing the paint
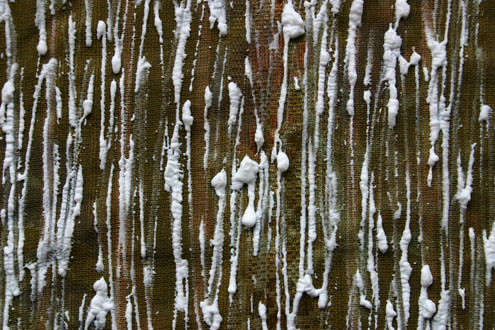
To start I wanted to see how fresh paint would react as compared to set paint (The bottle says to let it set for a minimum of 6 hours, but who needs instructions, right? ). Using the paint straight from the tube (which has a convenient nozzle), I drew vertical lines by squeezing the Touch Volume on one piece and let it dry overnight. I did the same to the second piece the next morning. I then used my heat gun to puff up the paint. They both puffed up in relatively the same manner, although I found the fresh sample came out with slightly more interesting irregular shapes.
This is how it started:
And now to add some colour. I grabbed my Tea Dye ink pad, and started tapping and smearing on the colour. I noticed that the fresh paint started to pull and flatten slightly while the set paint gladly held its shape. This photo shows the fresh paint:
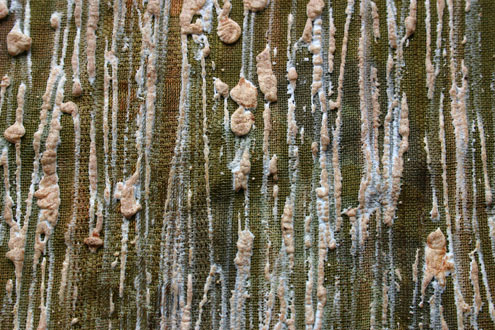
To add a little more depth, I decided to stiple on some fabric paint. I simply dipped a bit of kitchen towelling into the paint and sponged it onto the piece, although I’m sure you could get slightly different effects by using either a sponge or a stiple brush. Again, this is the sample that used the fresh paint:
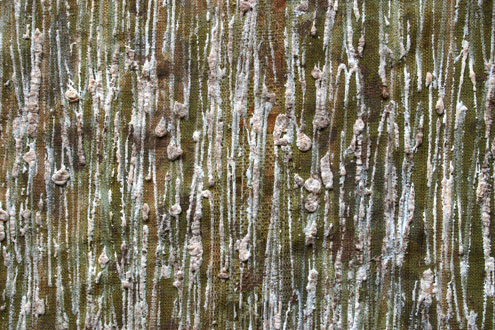
I added a bit more colour with ink, this time using my Vintage Photo inkpad. This sample and those that follow are using the set paint:
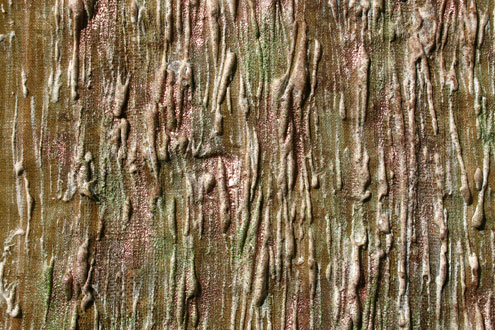
Now to have a bit of fun. I sprinked moss green embossing powder over the entire piece and heated it. I love how the embossing powder that was on the paint integrates itself (and the ink) into the puff paint when heat is added and the puff paint re-puffs slightly.

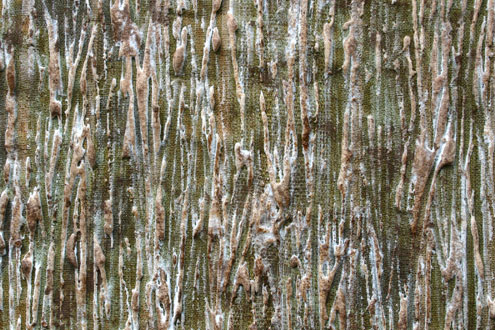
I did the same with the copper embossing powder:
Finally, I smeared a final coat of Vintage Ink over the entire piece to re-colour the paint. This sample is the fresh paint:
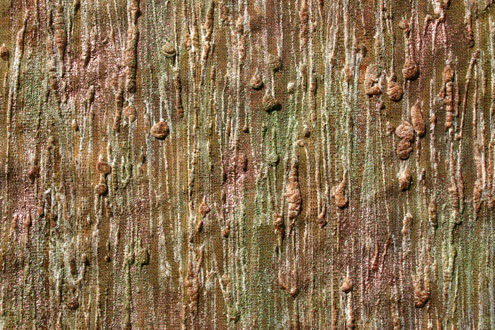
I decided at the end that I really like the effect I achieved with the fresh paint, which is good news since I won’t have to wait 6 hours for it to dry. :) However, I also tried heating up the set paint to soften it, and smacking it with a mallet. This resulted in a more smeared looks, similar to what I had achieved by using the fresh paint, although in my personal opinion is still prefer the result with the fresh paint, and the bonus is that i don’t have to heat and smack the fabric with a mallet.
As a note, this is obviously not a technique that can be used on anything that might come into contact with water as the ink will never permanently set, in fact, I plan to spray the piece with acrylic sealer to help seal the colours in. Also, you’ll probably not want to iron this piece as it will re-puff the paint and melt the embossing powder. Having said that, I think it would have a great background for a piece used in a wall hanging or similar project where washability is not a concern.
Comments
Glad to see you are taking some time out from tidying to be creative.
— Sue · 12 July 2006, 10:28 · #
I love how the piece turned out its brilliant . Keep up the great girly..
Dianne
— Dianne Marcoux · 12 July 2006, 13:05 · #
— Anna Sigga · 12 July 2006, 19:43 · #