
Category: Stamping
Articles in the Stamping category
I was wrapping presents yesterday when I discovered I had no gift tags. I had grand delusions of making some lovely tags with my daughter, but with all the things that have needed done around the house, they just didn’t happen. The wrapped (and unlabelled) gifts started piling up under the tree and I really needed to do something about it before I forgot which gift was which.
Being Sunday, a day when most shops aren’t open and the bus service is less than useful, I had to make them with what I had on hand. I looked through my rubber stamps in search of ideas, preferably simple due to time restricitions. I found a lovely holly-esque stamp (Hero Arts) that I though would be perfect. I grabbed some kraft coloured cardstock, a Merry Christmas stamp (Anita’s, I think), brown Archival Ink, a green water-based marker, my corner rounder, paper trimmer, hole punch, acrylic blocks, Peeled Paint Distress Ink (Tim Holtz/Ranger), a gold paint pen, and red, gold and clear Sakura glitter pens.
I cut my tags to a size I thought appropriate, in this case 1.5 by 4.5 inches, and used the green marker to colour the stamp before stamping the image of the holly on each tag. If I had a red marker, I would have coloured in the berries, too. I didn’t.

Instead, I used the red glitter pen to draw the berries on by hand.

And since I love using my corner rounder, I pull it out and clipped the corners of my tags.

I then coloured over the green stems with the gold glitter pen, and over the tops of the berries in the clear (silver) pen. I felt it gave the image a bit more life. To give added dimension to the tag itself, I used a scrap of felt lying around on my desk to blend the Distress Ink onto the edges of the tag. Ranger/Tim Holtz actually make a tool for doing this. I don’t have one, though I keep meaning to buy one. Instead I used what I had on hand.

For the back, I used the Archival Ink and I stamped the ‘Merry Christmas’ sentiment so it was off-centred (leaving room for the recipient’s name). I then outlined the tag using the gold paint pen to finish it off.

Presto! 18 gift tags without having to take a trip to the shops. A better view of the front and back of the tags:

And how they look on the pressies:

I got to play today. :)
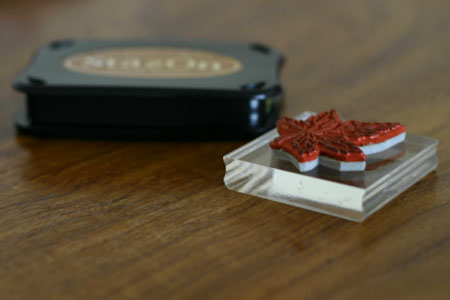
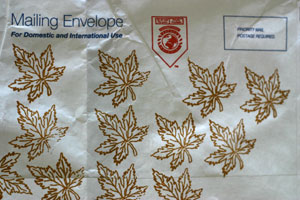
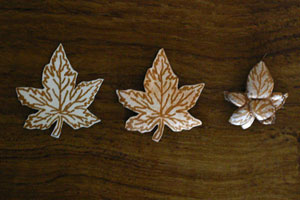
I’m working on some pages for a fiber friend’s book who’s theme is autumn, so I decided a bunch of leaves were in order. I also fancied doing a bit of stamping so I pulled out some Tyvek and my stamping supplies. In this case I’m using some used envelopes from USPS. It’s a bit thinner than the Tyvek you can buy at craft shops, but works about as well in most instances, although it’s easier to burn through the thinner Tyvek.
I used Staz-On to stamp my images. Once everything was stamped I cut them all out.
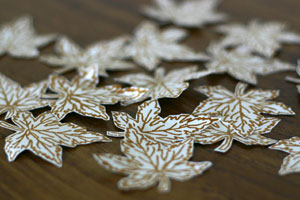
Then I coloured them with some metallic rubons from Craf-T. Any colouring agent will work, the idea is just to get a base colour while the Tyvek is still flat.
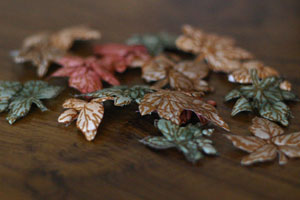
Once the base colour was applied, it was time to heat the tyvek. There are various ways to do this including using a heat gun or an iron. I usually opt for the iron. I use somewhere between a cotton and a wool setting, place the Tyvek image side down, place a piece of parchment over the Tyvek and hover the iron over the Tyvek so I’m as close as possible without actually putting weight on it. One note — once Tyvek starts to shrink it does so very quickly.
This is the pile after they were heated:
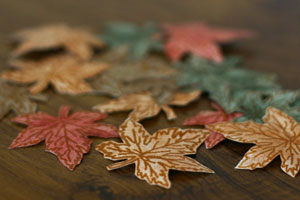
Finally, I applied additional colour to each leaf. In this case I used stamping ink, but again, any colouring agent will work. This shows the before and after:
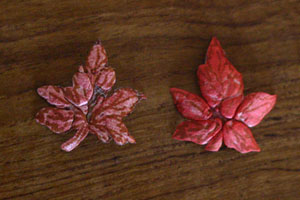
Now I have a bunch of leaves to add to my pages. :)
I had on of those hit yourself over the head moments. As I was on a bit of a stamping kick I was looking around the studio for other stuff I could stamp with. Why did it take so long for me to clue in to use my large collection of foam stamps?
For this piece I used some leftover sunprinted fabric (done with Pebeo Soleil paints). The first step was to print the fabric using Pebeo setacolour paints with bubblewrap, then I added a bit of green by sponging the paint on with a babywipe. More setacolour was used to stamp with the ornamental foam stamp, while the alphabet was done with Fabrico (by Tsukineko ) inks and a rubber stamp. A little bit of running stitch was added for good measure.
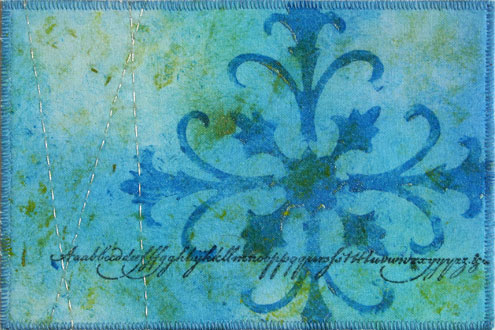
I love how the fushia ‘stamping with found objects’ postcard turned out, so I thought I’d try it with a different colour scheme. I used the same object as the last postcard, but this time I experimented by stamping with Pebeo mica flakes using the pencil rubber. I also tried stamping with my rubber stamps. The black stamped images are done with a black fabric stamping ink called Fabrico by Tsukineko wilst the number 42 is done using Pebeo setacolour shimmer paints as a stamping medium.

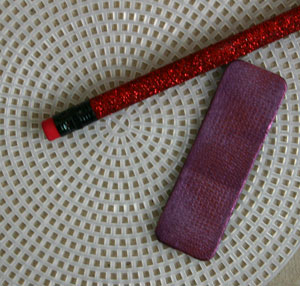
I was inspired to do a bit of stamping on my postcards, so I looked around for a few objects on my desk that would make good stamps. I choose a piece of plastic canvas mesh, a rubber on the end of a pencil and a chipboard embellishment in my scrapping stash. I use Pebeo setacolour fabric paints to act as my stamping medium and had a bit of a play. I’m quite chuffed at how the postcard turned out, but I’m even more pleased about how that little chipboard embellishment piece looks with the paint on it. I decided not to clean it as I want to use it as is on a future piece. :)
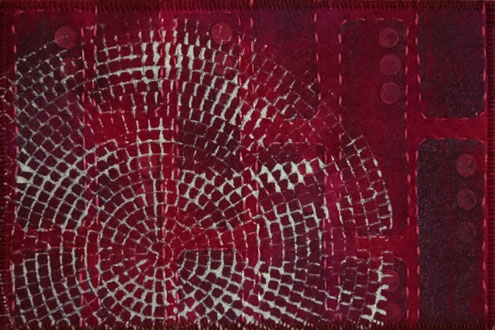
I’m using this piece for my ‘abstract’ theme for the Textile Tuesday challenge
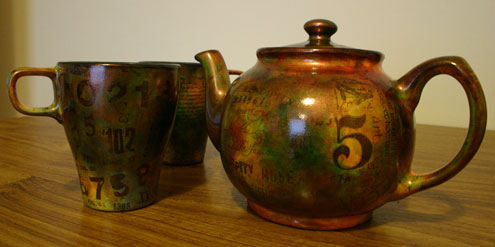
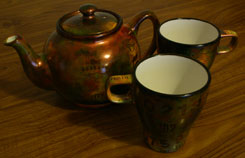
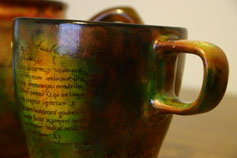
I was flipping through the Somerset Home publication and saw and saw Sarah Hodsdon’s gorgeous ‘Tea with DaVinci’ article, and knew immediately I had to make a tea set of our own.
Our tea set comprises of 6 cups, two milk pourers (one marked ‘milk’ the other marked ‘soy’), a sugar bowl and a tea pot. Each cup has it’s own theme consisting of numbers, letter fragments, rulers, pens, mail art, and art muse. The tea pot has a combination of all the themes and the milk and sugar containers all have a botanical theme.
Even thought I used the same colours called for in Sarah’s article, my set came out really different and very earthy in colour…. very me. I love how it came out, and Joey seems quite pleased with it. We really do like our tea, and I’m hoping that this will mean we can set the tea set out in the lounge when we’re entertaining so that we Joey doesn’t have to keep running back and forth to the kitchen when our cups are empty.
Now I just need to quilt a tea cozy for it. :)

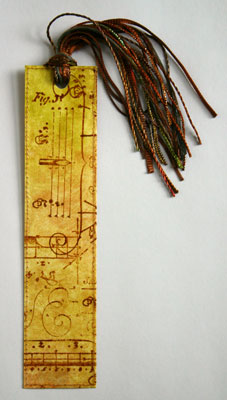
One of the stocking stuffers that I made Joey was a stamped bookmark. I saw a workshop by Kathy McCreedy in the winter 2006 issue of Cloth, Paper, Scissors magazine on creating bookmarks and other assorted items out of Tyvek and knew I had to give it a go.
This is how mine turned out. I love it. Especially with the beautiful hand-dyed fibres from Oliver Twists. Joey seems to like it. It’s currently holding place in his new Terry Pratchett book he’s devouring.
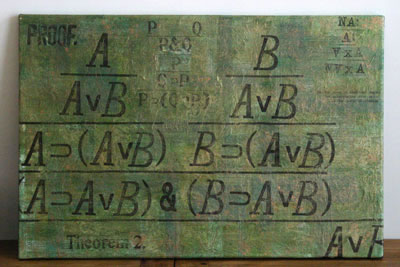
When Joey moved into his new office, he requested a painting for the large blank wall above his desk. Well it took many months of procrastination, but the canvas is finally finished. :)
It’s a mixed media piece of book pages, papers, tissues, gouache, acrylic, watercolour, ink and stamps (foam, rubber and homemade), and some glue for good measure. The formulae on the canvas are actually particular to the work that Joey does, just to add a personal touch to the piece. The piece has a bit of a texture to it, worked in through multiple layers of papers and it’s got a lovely golden-copper sheen to it, which unfortunately does not show in the photo.
The canvas measures 30×20-inches, without any visible staples, and the work wraps to the back of the canvas, which means as soon as I attach the cord to the back, he’ll be able to take it into work and hang it without any need of a frame.
Another WIP (work in progress) done. ;)
I love this font. In fact, I loved it so much I bought the Polaroid stamp that Ma Vinci made. :)

These were so much fun to do. :)
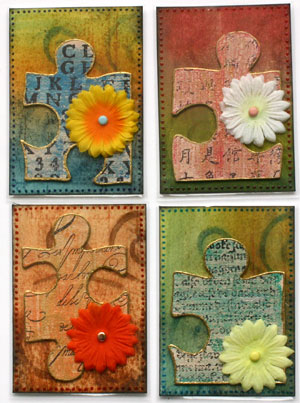
The background were made by smearing dye inkpads across the cardstock and blending them with a babywipe. The backgrounds were then stamped with versamark and lightly chalked with a similar colour to the background. The borders were created using Sakura glaze pens of a similar colour dotted along the edges.
The puzzle pieces themselves were cut from chipboard, painted with layers of gesso and acrylic to create a light texture, wiped with a neutral dye inkpad and blended in with a baby wipe. Once dry, the piece were stamped and the edges were guilded with a metallic gold paint pen.