
Category: Textiles
Articles in the Textiles category
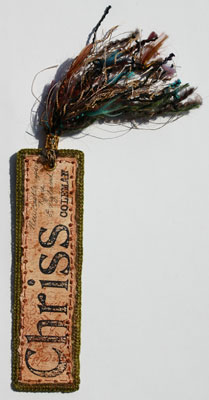
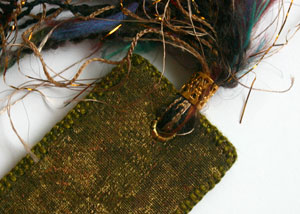
While I was working on all the hand stitching on the cover of my book, I decided I needed to finish something to make me happy, so I fashioned my sign-in tag for my book. I figured with a theme of letters/writing that a bookmark tag would be very appropriate. :)
I fashioned my bookmark with remnants of the fabric I printed for use on the cover and sub-cover, with a felt interior and I used Bondaweb to fuse all the layers together to keep them still and stiff while I handstitched.
First thing, I used various gesso techniques to produce the background on the watercolour paper, stamped a cursive writing image with a copper Brilliance inkpad, tore the paper to size using a ruler as a guide, and chalked the edges with copper Craf-T glimmer chalks
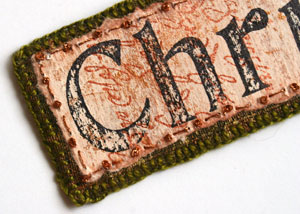
I fused a piece of the printed fabric to a piece of felt and cut to size. I then tacked down the paper with a bit of double-sided tape to keep the paper in place while I hand stitched around the edges of the paper in metallic copper thread with a simple running stitch combined with french knots.
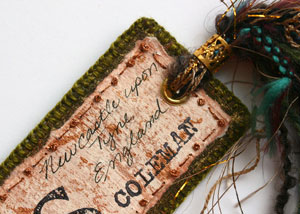
Once my stitching was in place I carefully stamped my name (Ma Vinci stamps ) and handwrote my location.
With all the stitching done on the front, I then fused the fabric for the back of the bookmark to the piece, and trimmed down the fabric to size. I stitched around the entire bookmark in blanket stich using pearl cotton embroidery thread, and I started at the top middle so that my initial stitches would be covered by the tassle.
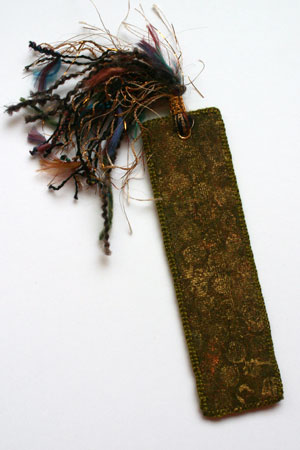
I used a grommet (large eyelet) to create a hole in which to thread my fibres through, and used a Mermaid Tears’ Tassle Tube as a collar for the fibres.
While designing my journal, I knew that I probably wouldn’t be able to stick to just fabric. Of course, since my theme is writing/letters the addition of paper works really well with my theme—so that’s just what I did with the second leaf of my journal.
I used two pieces of the printed fabric that I posted about yesterday as my background for this technique. As it turned out, I probably wasn’t necessary and I could have simply used the fabric in its original form, but since I didn’t know how much distressing I’d do, I decided to use the printed fabrics.
Ingredients:
- Fabric to use as a base
- Adhesive web such as Bondaweb or WonderUnder
- Felt or fleece (I used some cheap felt)
- Text pages from a book, newspaper or magazine
- Tim Holtz Distress Inks in a variety of brown tones (I used Old Paper, Tea Dye and Vintage Photo) or similar colouring agent such as Walnut Ink or Tea and Coffee
- Iron and Sewing Machine
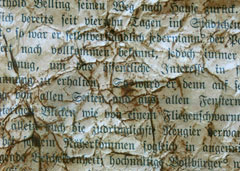
My first step was to distress these papers. I love these. They are from an old German book that is printed in Blackletter that I’m planning to alter.
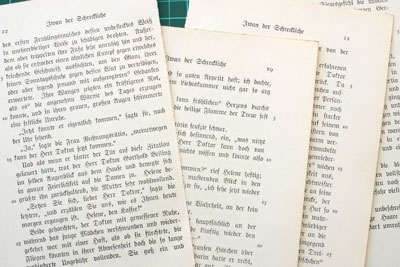
I used my Distress Ink in Tea Dye and tapped it all over the page (the ink should be visibly wet). I then took a baby wipe and smeared the ink to cover the page. The ink will actually smooth out and dry much lighter than it first appears.
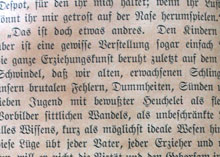
Crumple the papers, taking some caution as to not destroy them, but don’t worry about any small tears as it will just add to the distressed look.
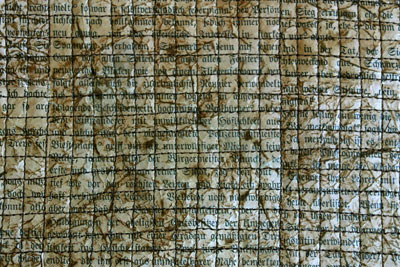
Smooth the pages out slightly and lightly tap some Vintage Photo Distress Ink over the page. Be sure to let the pages dry before preceding to the next step.
While you are waiting for your paper to dry, fuse your fabric to the felt or fleece using the adhesive web according to the package directions. The felt will give the piece a lightly quilted look and help stabilize the fabric while you are sewing.
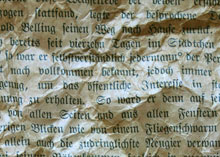
Once the paper was dry, I cut down my pages so I no longer had a margin around the text and began sewing the vertical lines across the piece essentially quilting the paper to the fabric. Piece the text paper as needed to cover the entire area. Once the entire area is covered, sew perpendicular lines to form a grid. Remember, the grid doesn’t need to be perfect. ;)
I zigzagged a few random lines on the grid, about 6 in each direction, just to give a bit of effect. Now the fun begins. :) Take the thread and the foot off your sewing maching and turn down the feed dogs and Free Motion Embroider the entire piece—I was sewing with the pedal to the floor and sewing quite tight as if I were doing a granite stitch. The idea is to distress the papers and make them more supple…
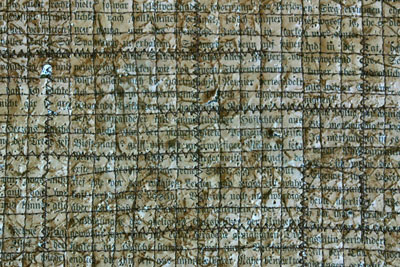
Finally, I scraped across the piece with my fingernails to loosen the paper (you may wish to do this over a bin or outside—definitely don’t do this on a carpet as it creates a lot of mess). Scrape as much or as little as you feel is necessary to create the desired effect. I think lightly inked the papers again with a combination of Old Paper, Vintage Photo, and Tea Dye Distress Inks for a bit more colour.
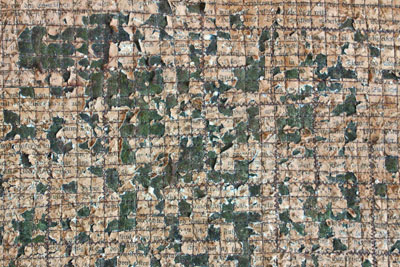
And that’s the top page of the second leaf of my book. Once I finish my sign in page I can sew them back to back and bind the edges.
The inspiration for this piece came from several Maggie Grey Books, including Layers of Stitch (co-written with Valerie Campbell-Harding) and Paper, Metal, Stitch (with Jane Wild). I’ve yet to purchase a Maggie Grey book that I haven’t loved.
My fabric journal is starting to come along nicely, and I thought I’d share it’s progress, and a few techniques along the way. I’ve designed the cover with an openwork front and back cover which shows through to the next page—the ‘inside cover’. This printed fabric will be the back of the openwork cover and the background for the front of the inside cover.
Ingredients:
- Base Fabric
- Fabric Paints (I used Pebeo Setacolour in Chamois, Shimmer light copper and Shimmer Gold)
- Item to print with (I used a sponge, some newspaper, and some bubblewrap)
- An iron
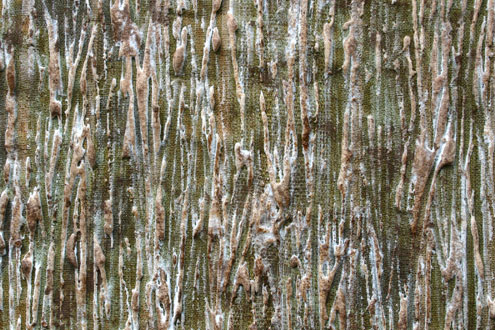
I started with that same commercial fabric I was using for the Puff Paint Experiment. This is it’s unaltered state:
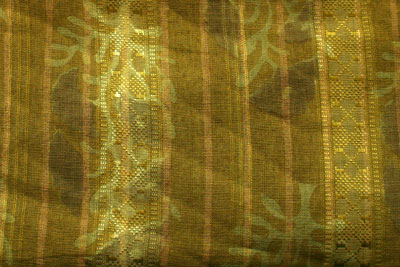
My first task was to ‘muddy it up’ so to speak. Basically, I wanted to take a dark colour in the same family as the fabric (in this instance the Chamois—which is more like a brown) and sponge it across the fabric to obliterate most of the print of the fabric. I used a rather subtle printed fabric to start with, so this task was not difficult.
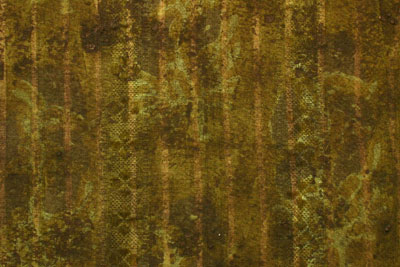
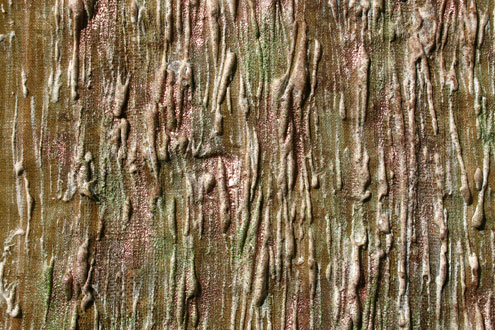
Next, I crumpled up a bit of newsprint and added light touches of the Simmer light copper paint all over the fabric.
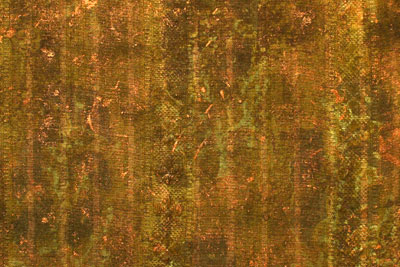
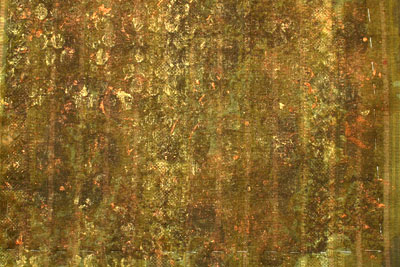
For my final layer of paint, I brayered some of the Simmer Gold onto a piece of bubble wrap and printed that onto the fabric, repeating until I was happy with the results. Anything that can print a bold image will work, I just really happen to like the look of printed bubble wrap.
Now usually you should wait about 12 hours and then fix with an iron according to the instructions, however if you are using a fabric that won’t melt under a heat gun, a couple minutes under the heat gun (always moving the heat gun…. don’t just keep it in one spot) will dry the paint enough that you can iron fix it, always remembering to use a pressing cloth over top.
I printed four of these pieces. Two of them will remain as you see them an become the back side of the front openwork cover. The other two will become the background of the subsequent page, which I’ll post tomorrow. :)
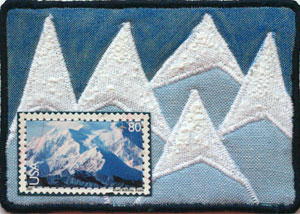
Having a little bit of fun on some swap cards I’m doing, and I was totally inspired by the stamp featuring Mount McKinley in Alaska.
The fabrics are all linen or cotton with a felt interior to give it some body. The fabrics were also enhanced with some blue Pentel FabricFun fabric pastels for the sky, and some white Pebeo Touch Volume on the white linen to give the effect of snow on the mountains.
I decided to do a bit of some experimenting while developing some backgrounds for some current projects I’m working on. I was fairly pleased with the results so I thought I’d share the process here.
Ingredients:
- Commercial or hand dyed fabric (I used a commercial piece that has a variety of weaves and colours included some lovely moss greens and tans)
- Puff Paint (I used Pebeo Touch Volume in White)
- Fabric paint (I used Pebeo Setacolour in Chamois)
- Ink Pads (I used Tim Holtz Distress Inkpad in Vintage Photo and Tea Dye)
- Embossing Powders (I used Heat It Up! embossing powders in Moss and Copper)
- A sponge, brush or some kitchen towelling for dabbing the paint
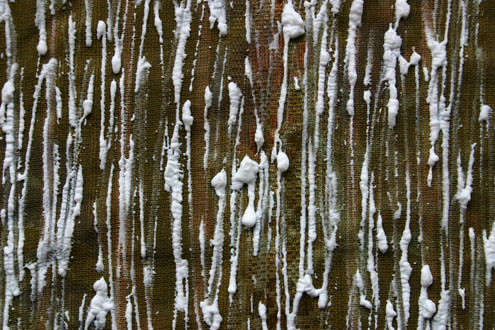
To start I wanted to see how fresh paint would react as compared to set paint (The bottle says to let it set for a minimum of 6 hours, but who needs instructions, right? ). Using the paint straight from the tube (which has a convenient nozzle), I drew vertical lines by squeezing the Touch Volume on one piece and let it dry overnight. I did the same to the second piece the next morning. I then used my heat gun to puff up the paint. They both puffed up in relatively the same manner, although I found the fresh sample came out with slightly more interesting irregular shapes.
This is how it started:
And now to add some colour. I grabbed my Tea Dye ink pad, and started tapping and smearing on the colour. I noticed that the fresh paint started to pull and flatten slightly while the set paint gladly held its shape. This photo shows the fresh paint:
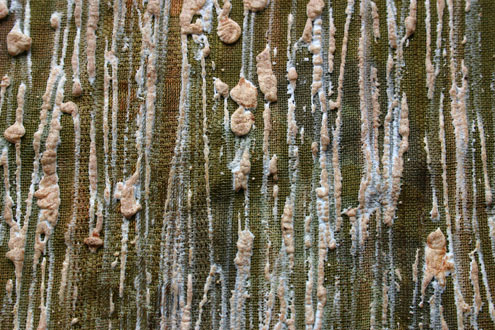
To add a little more depth, I decided to stiple on some fabric paint. I simply dipped a bit of kitchen towelling into the paint and sponged it onto the piece, although I’m sure you could get slightly different effects by using either a sponge or a stiple brush. Again, this is the sample that used the fresh paint:
I added a bit more colour with ink, this time using my Vintage Photo inkpad. This sample and those that follow are using the set paint:
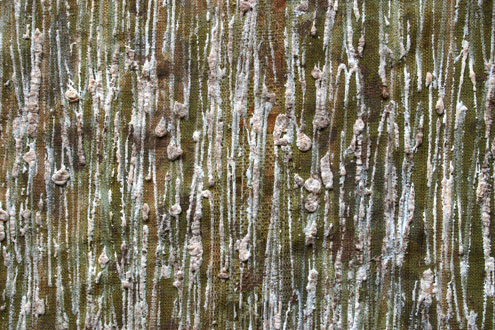
Now to have a bit of fun. I sprinked moss green embossing powder over the entire piece and heated it. I love how the embossing powder that was on the paint integrates itself (and the ink) into the puff paint when heat is added and the puff paint re-puffs slightly.

I did the same with the copper embossing powder:
Finally, I smeared a final coat of Vintage Ink over the entire piece to re-colour the paint. This sample is the fresh paint:
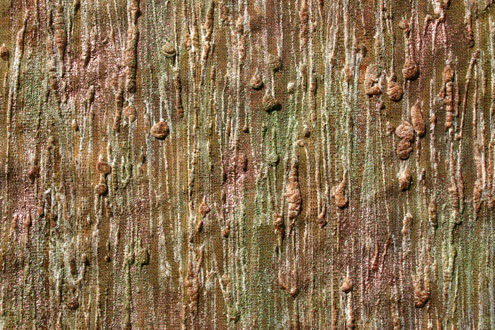
I decided at the end that I really like the effect I achieved with the fresh paint, which is good news since I won’t have to wait 6 hours for it to dry. :) However, I also tried heating up the set paint to soften it, and smacking it with a mallet. This resulted in a more smeared looks, similar to what I had achieved by using the fresh paint, although in my personal opinion is still prefer the result with the fresh paint, and the bonus is that i don’t have to heat and smack the fabric with a mallet.
As a note, this is obviously not a technique that can be used on anything that might come into contact with water as the ink will never permanently set, in fact, I plan to spray the piece with acrylic sealer to help seal the colours in. Also, you’ll probably not want to iron this piece as it will re-puff the paint and melt the embossing powder. Having said that, I think it would have a great background for a piece used in a wall hanging or similar project where washability is not a concern.
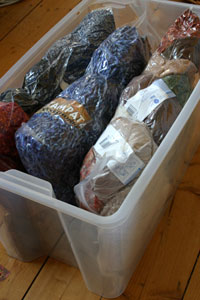
I’ve need a better way to store my yarn for a while. It’s not that the way I was storing it was bad or anything, I had the balls stored in 2 clear plastic tubs. The problem was that I had them in the corner behind my desk where they were hard to get to and they often became a resting spot for other things, making it even harder to pull anything out of them. To add to that, I always kept my unfinished knitting projects in plastic carrier bags that were piled haphazardly around the yarn containers.
I pulled everything out of the corner, and sorted my yarns into A3 griplock bags in some sort of colour theme, as well a bag of my most loved yarns. I then squeezed all the air out of the bags, so they take up nearly half the space (as you can see in the photo). I’m not using the container anymore, since I figured it was more valuable for other things, instead I’ve piled them on the floor of my wardrobe where I have easy access to them. I’ve also taken all my knitting projects out of their plastic carrier bags and put them into the A3 griplock bags so I can see, at a glance, what is in them. They now live on top of the yarn bags.
A few weeks ago I signed up for a fabric journal/book round robin in one of the stitching groups I belong to. This morning the groups were announced, and I am absolutely stoked and simply can’t wait to get started. I’ve already sketched out my designs for the covers and sign-in pages, so now I just need to create them. :)
I’ve chosen a theme of letters/writing… I even have some new writing-themed rubber stamps to play with!!! I think I’ll be spending this weekend dying fabric. I’ll post stuff as soon as there is something tangible to post. :)
Can you tell I’m excited??? :D
All the pages for this book can be found under Fabric Journals.
Here it is, the first page of the fabric journal that I’m working on. I’ve called this page ‘City At Night’ or otherwise known as ‘Who Left the Lights On?’. ;) To those of you that know me well, the theme won’t come as a surprise—what can I say, I love buildings, architecture and cityscapes.
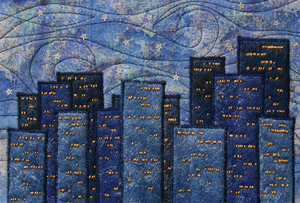
I’ll upload each page as I get it done, and once I’ve finised all the pages, I’ll bind the whole thing together and take a photo of that, too. :) If you are interested in the materials list and such for this page, just click on the photo—I’ve loaded it all into the gallery description.
I’ve been working on a page for a fabric journal recently. I forgot how much I love textiles. I forgot how much I love to sew. I forgot how slow domestic sewing machines really are…. I had my foot to the floor and was so close to yelling at the machine to go faster. It is my firm belief that sewing machines, like cars, should be rated by horsepower. Seriously, I need more power!
In so many ways, I’ll be very happy when my Textile Studio and I are living together again, although the thought of moving and unpacking all that stuff gives me cold sweats. I will be happy to have all much stuff at my disposal again—my dyes, my machines, my stash. :)
I’m almost done my page, and I’ll share it once it is done—hopefully Monday. No promises. I was fairly close to finishing it last night when the worst thing happened—I ran out of thread and all the sewing shops were closed.